
Do you want to sell more e-books on your WordPress website and connect with your readers? The solution is to create your own eBook selling platform with the help of flipbooks. It will help you control your brand, keep more profits and build a loyal community. Stop depending only on marketplaces. Create your own online bookstore. Selling eBooks directly gives you control. Everyone thinks that building an eBook selling platform is expensive and complicated, but it’s not.
Every author, writer, and publisher dreams of having a selling platform. They want a dedicated space for their eBooks and want to communicate directly with readers. But they don’t get proper guidance and easy solutions. In this blog, I will show you the simple steps to building a complete flipbook-powered eBook selling platform using WordPress. You will learn how to select the right technology and promote your platform.
Planning Your eBook Selling Platform
This article will guide you to create a fully functional ebook selling platform. Assuming you already have one or a few ebooks ready for sale in PDF format. If you don’t have any books yet, I’d suggest you work on that part first. However, if you still like to learn or get the platform ready as the first step, let’s move along.
What You Need For Your eBook Selling Platform
Thank you for deciding to move along, the next step is to gather a few things that will be needed along the way. Here is a quick list of what we’ll need:
- Domain
- WordPress Supported Hosting
- WooCommerce Plugin
- TNC FlipBook – PDF viewer for WordPress
- WP File Access Manager
- Secure PDFs – TNC FlipBook Addon
Step-by-step Guide to Creating a FlipBook Powered eBook Selling Platform
Step 1. Set Up Your WordPress Website:
- Select & Register a Domain: To get a WordPress domain, think of a short, simple name and choose a name ending like .com, .net, etc.
- Choose & Purchase a Hosting Plan: Select a reliable hosting service that meets your needs. Go to a site like Namecheap or GoDaddy, check if the name is available, and buy it. Consider factors like storage, bandwidth, and customer support.
- Install WordPress: Most hosting providers offer one-click WordPress installation. Follow their instructions and quickly install WordPress.
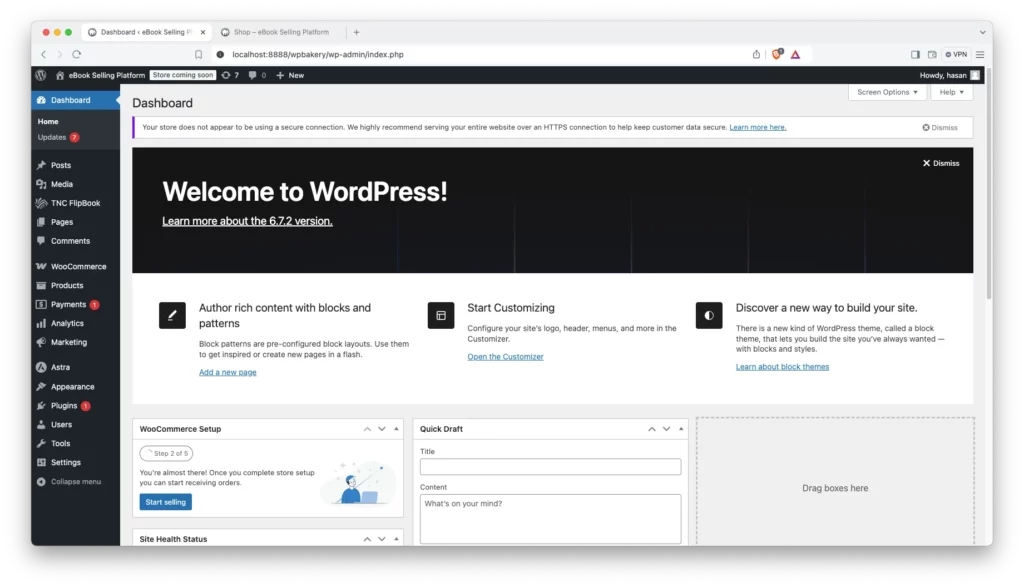
- Install a WooCommerce-Supported Theme: To sell products on your WordPress site, you need a theme that works well with WooCommerce. This makes your online store look good and work perfectly. You can use the Astra or any other WooCommerce supported theme. It is a free theme and is designed to work perfectly with WooCommerce.
Step 2. Install Essential Plugins:
- WooCommerce: This plugin turns your WordPress site into a fully functional online store. It handles product listings, payments, and order management. Click here to get this plugin.
- TNC FlipBook – PDF viewer for WordPress: TNC FlipBook ensures that you can create the perfect flipbook for your eBook. This is one of the most convenient flipbook creator plugins for WordPress websites. Click here to get this plugin.
- WP File Access Manager: This plugin allows you to control access to each file uploaded to your WordPress media library. This ensures that your eBooks are highly secure for your sales platform. It comes with integration with WooCommerce and Paid Memberships Pro. Click here to get this plugin.
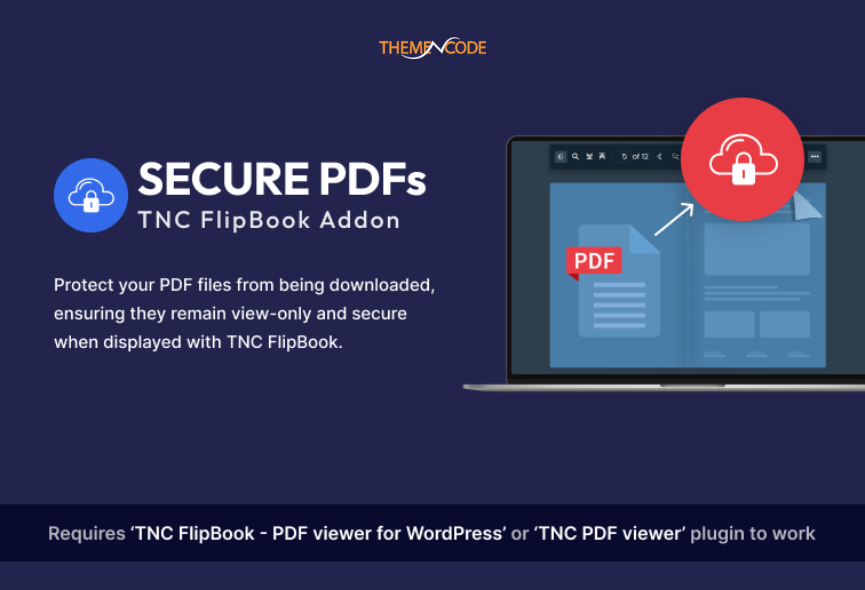
- Secure PDFs: This is an add-on to TNC FlipBook. It protects your PDF files when viewed using the TNC FlipBook plugin. Secure PDFs stop people from downloading or easily sharing your files so your eBook stays protected. Click here to get this add-on.
Step 3. Create Flipbooks From Your eBooks/PDFs:
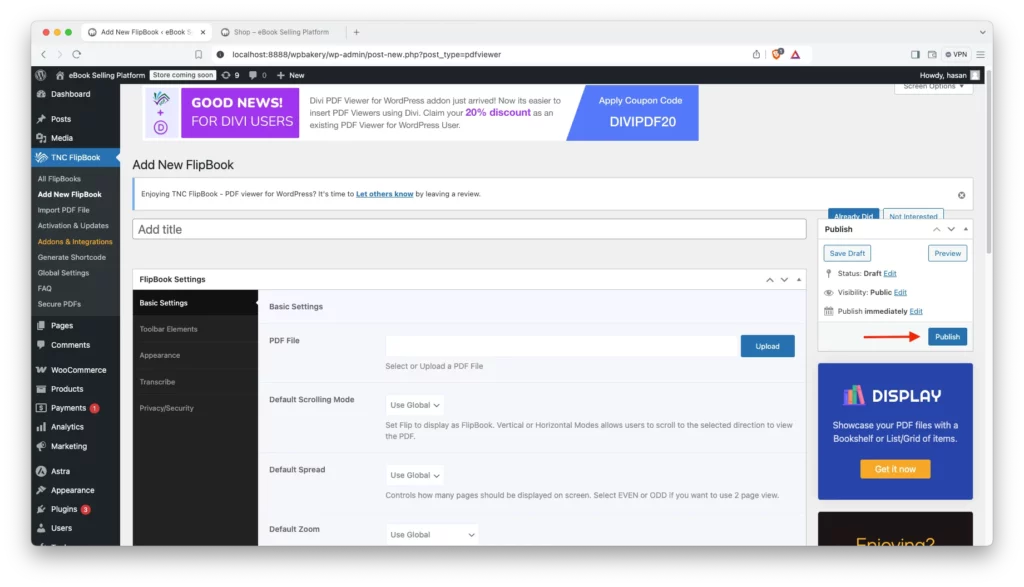
- Access TNC FlipBook: Open TNC FlipBook in your WordPress dashboard and click “Add New FlipBook”.
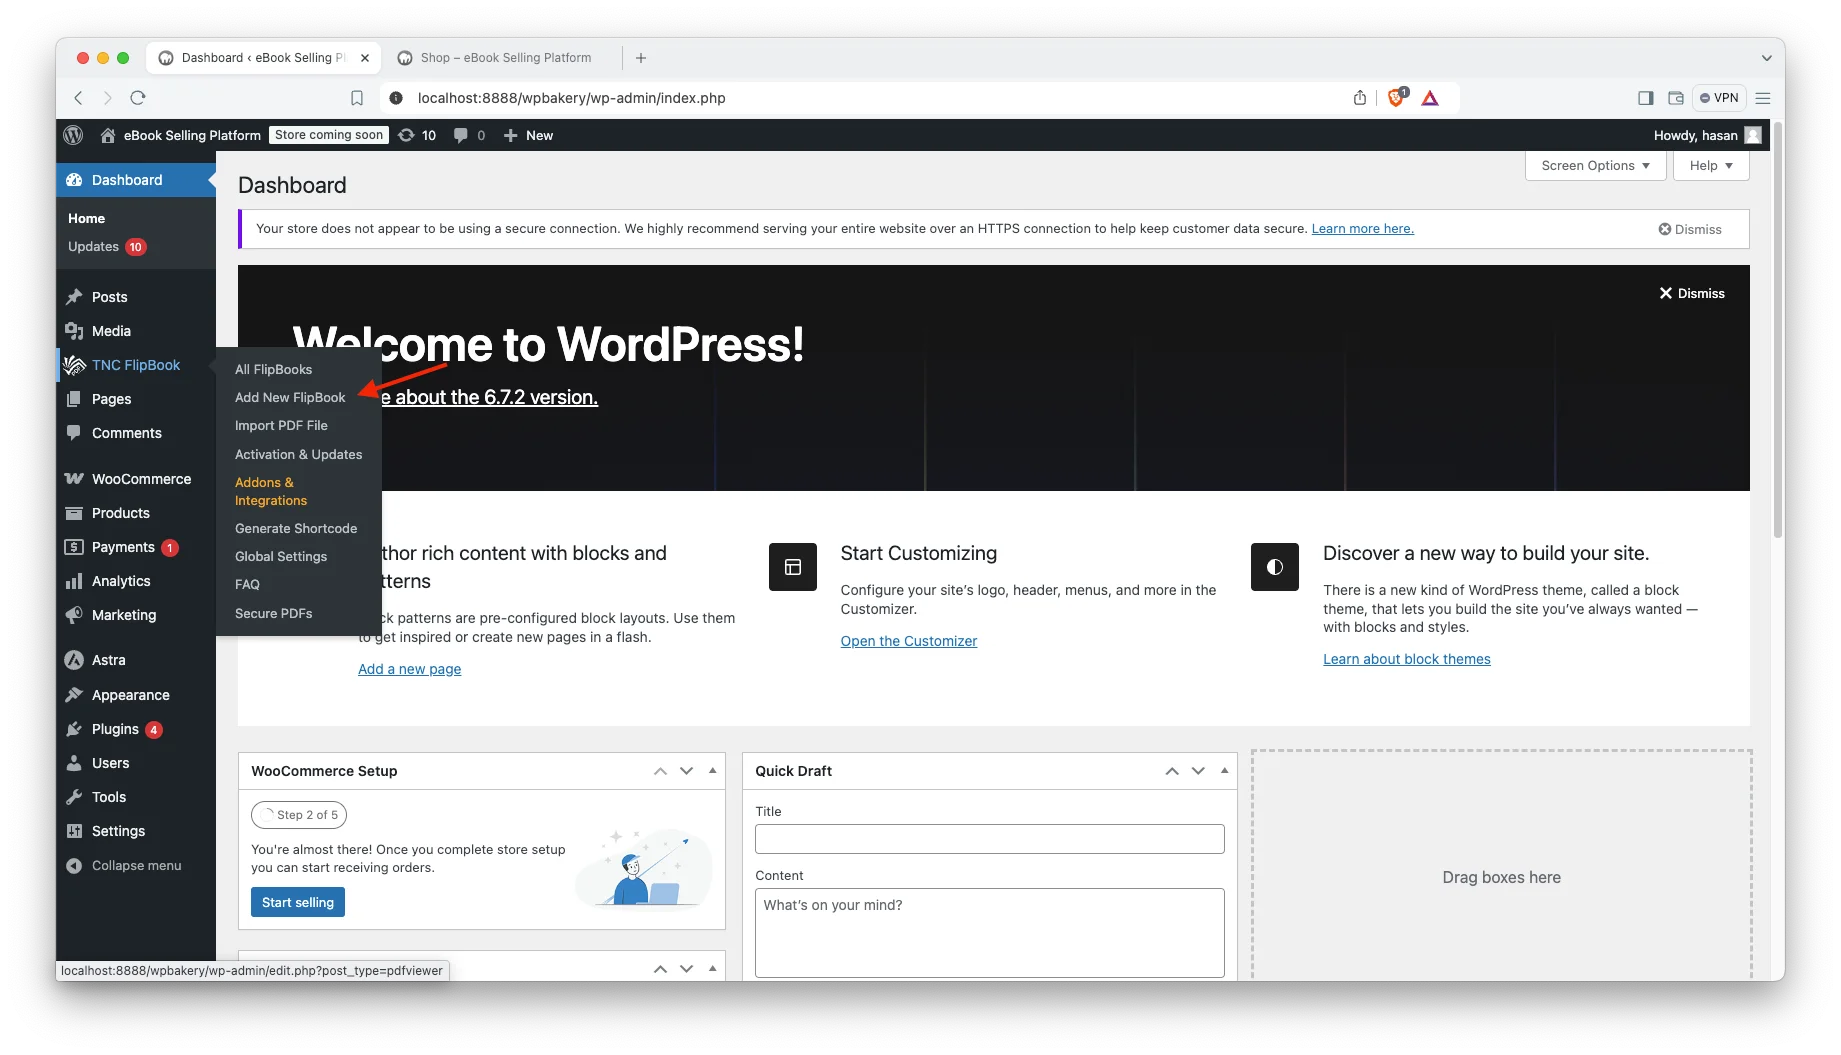
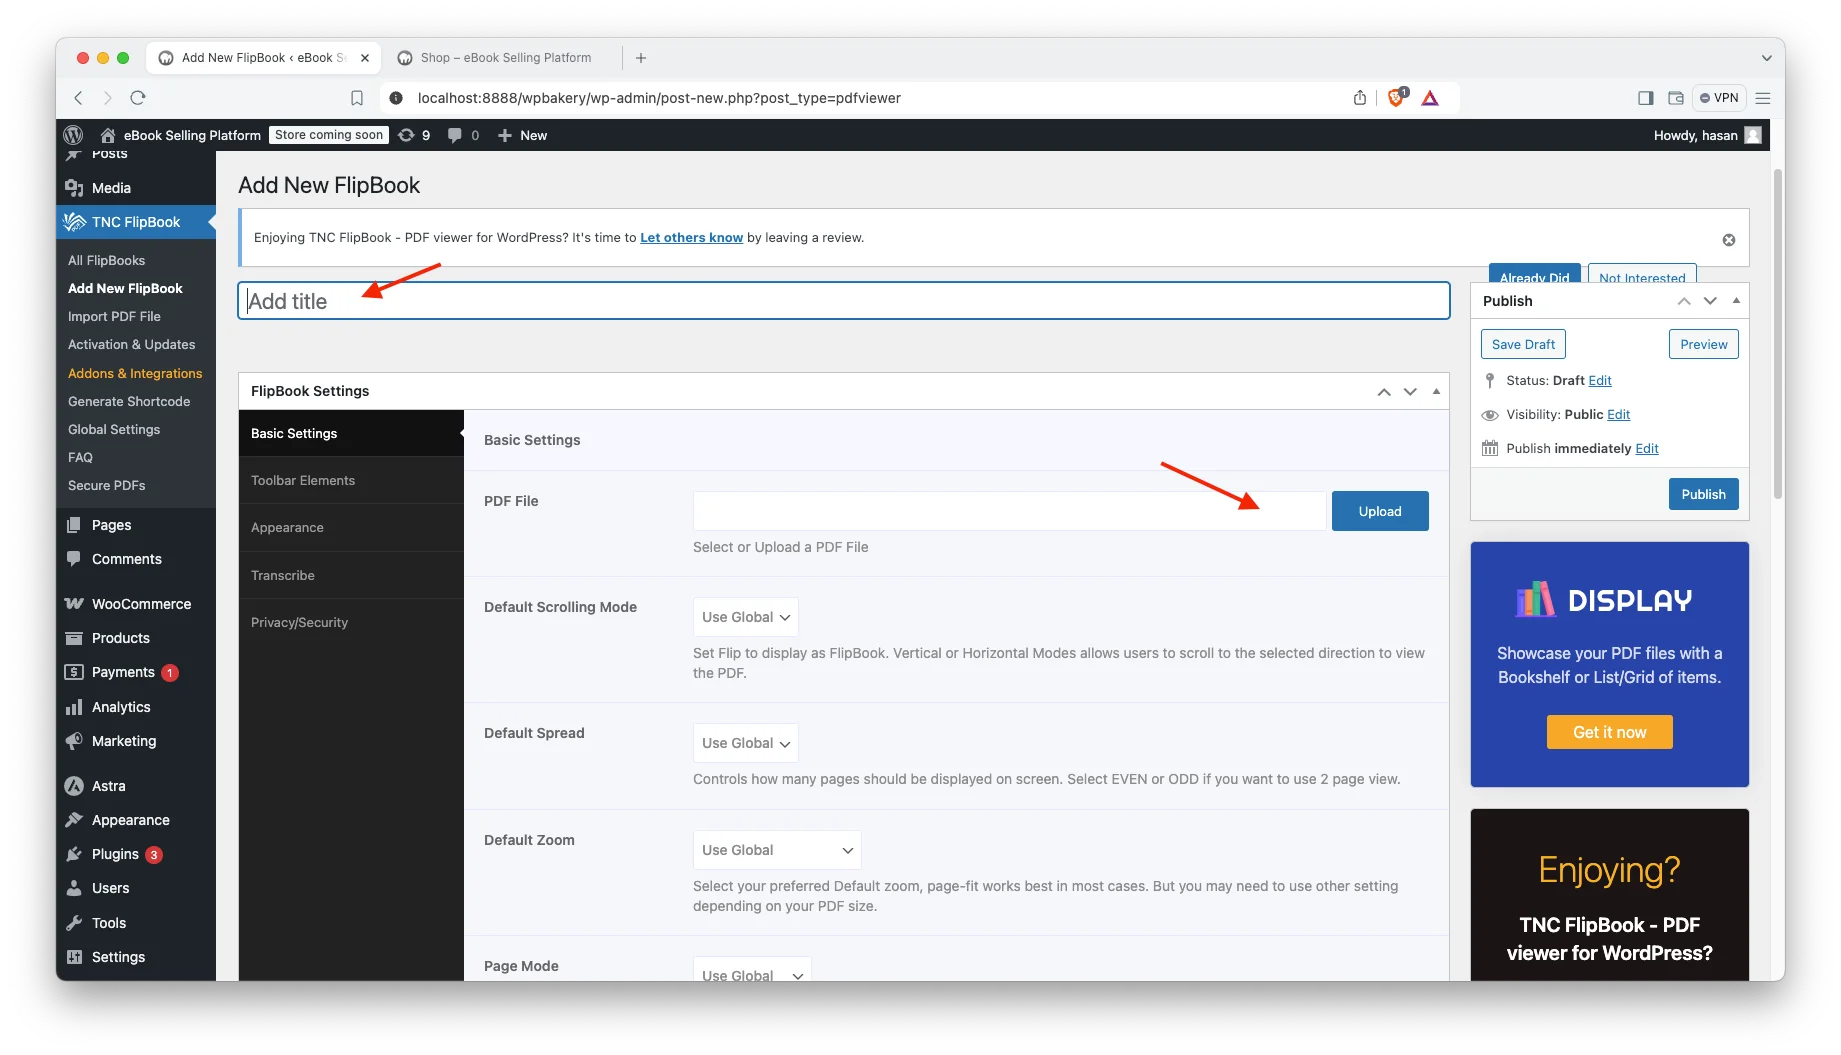
- Import Your eBook/PDF: Give your flipbook a name. Choose and upload your eBook or PDF file from your computer that you want to convert into a flipbook.
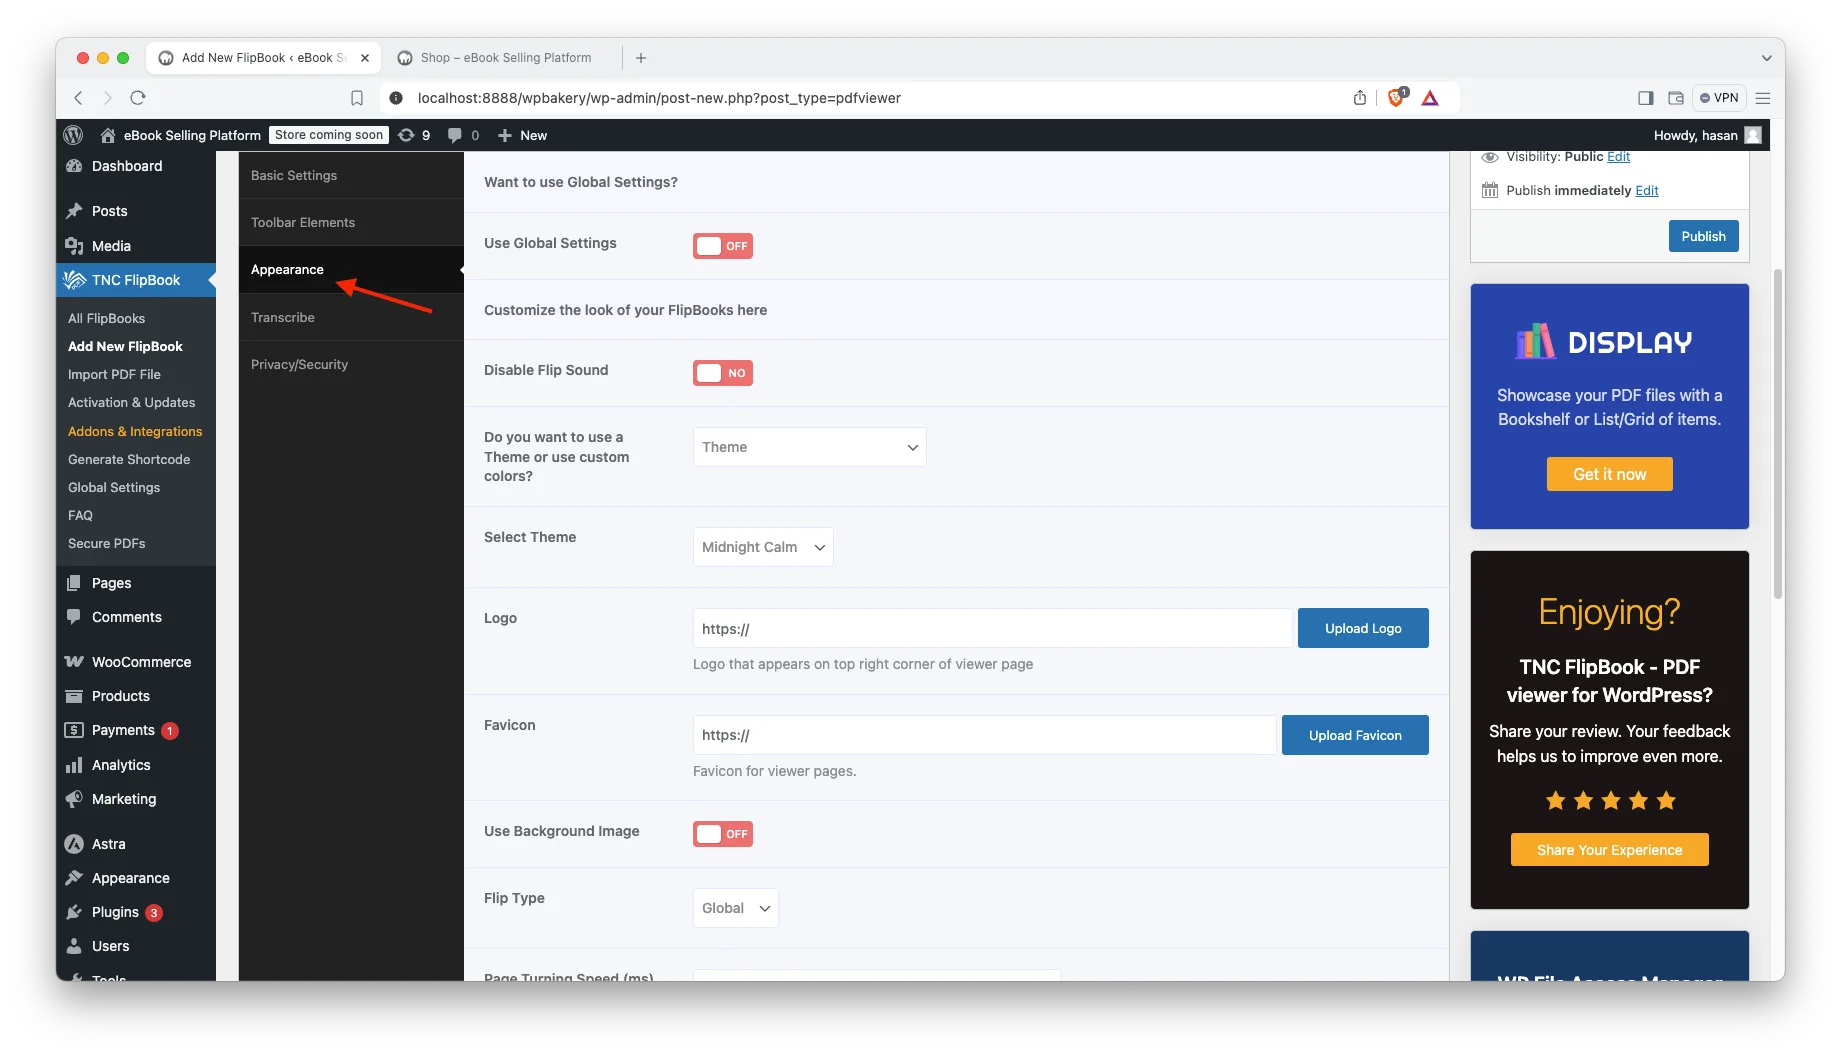
- Customize Flipbook Appearance (Optional): TNC FlipBook is highly customizable. You can choose a predefined theme. Customize the background, colors, page-turning scrolling effects, and more. You can also add your logo or favicon. You can control which buttons or features are visible in your FlipBook toolbar. You can also let your readers listen to your flipbook by enabling the transcribe option.
- Generate/Publish Your FlipBook: You will see the “Publish” button, click Publish to complete the flipbook creation process. Then click “Preview” to see how the flipbook looks on your website.
“After creating your flipbook, Secure PDFs keeps your eBook safe. No one will be able to download, share, or print your file. You can do it without any hassle. Just install this add-on and it will start working automatically.”
Step 4. Configure WooCommerce Downloads:
- Open WooCommerce: First you need to go to the WooCommerce settings tab. Here, you will find an option “Products”. In this section, you will find “Downloadable Products”. Click on it.
- File download method: After clicking on “Downloadable Products”, you will find an option called “File download method.” In this case, select “Redirect Only (insure)” and click on Save Changes.
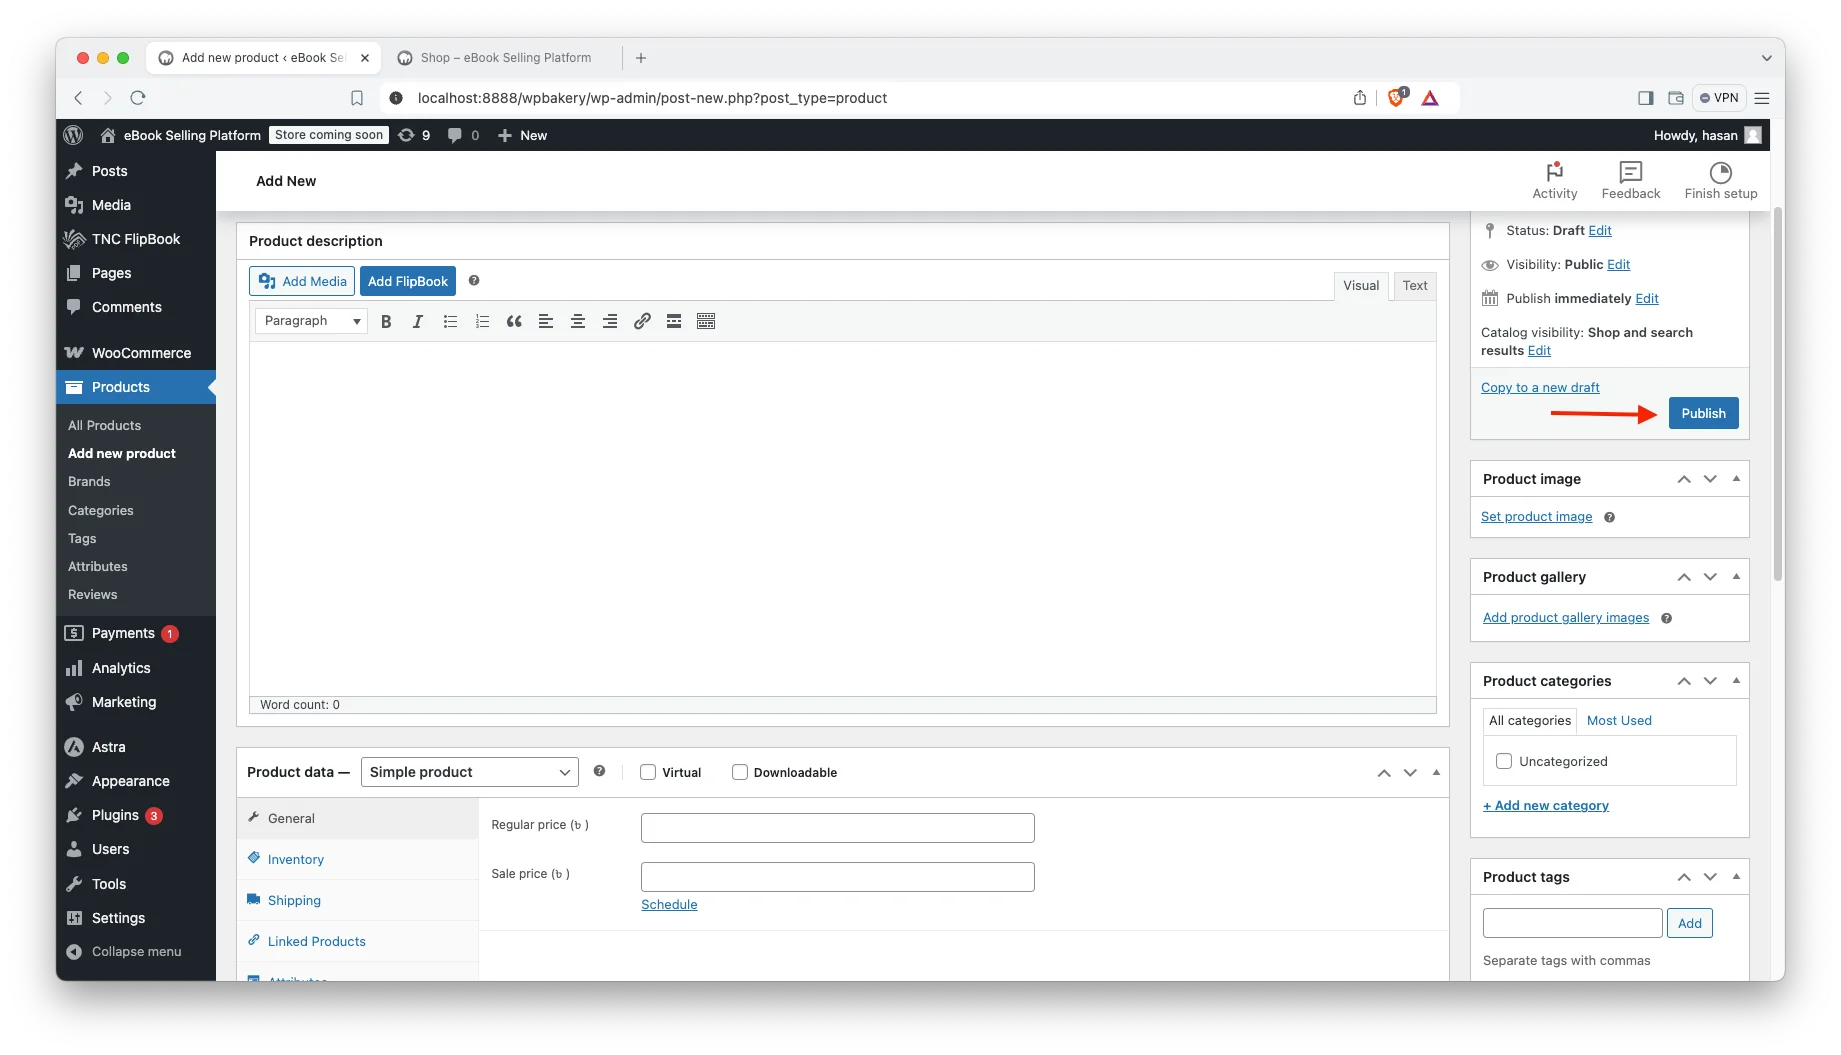
Step 5. Create Your eBook Products:
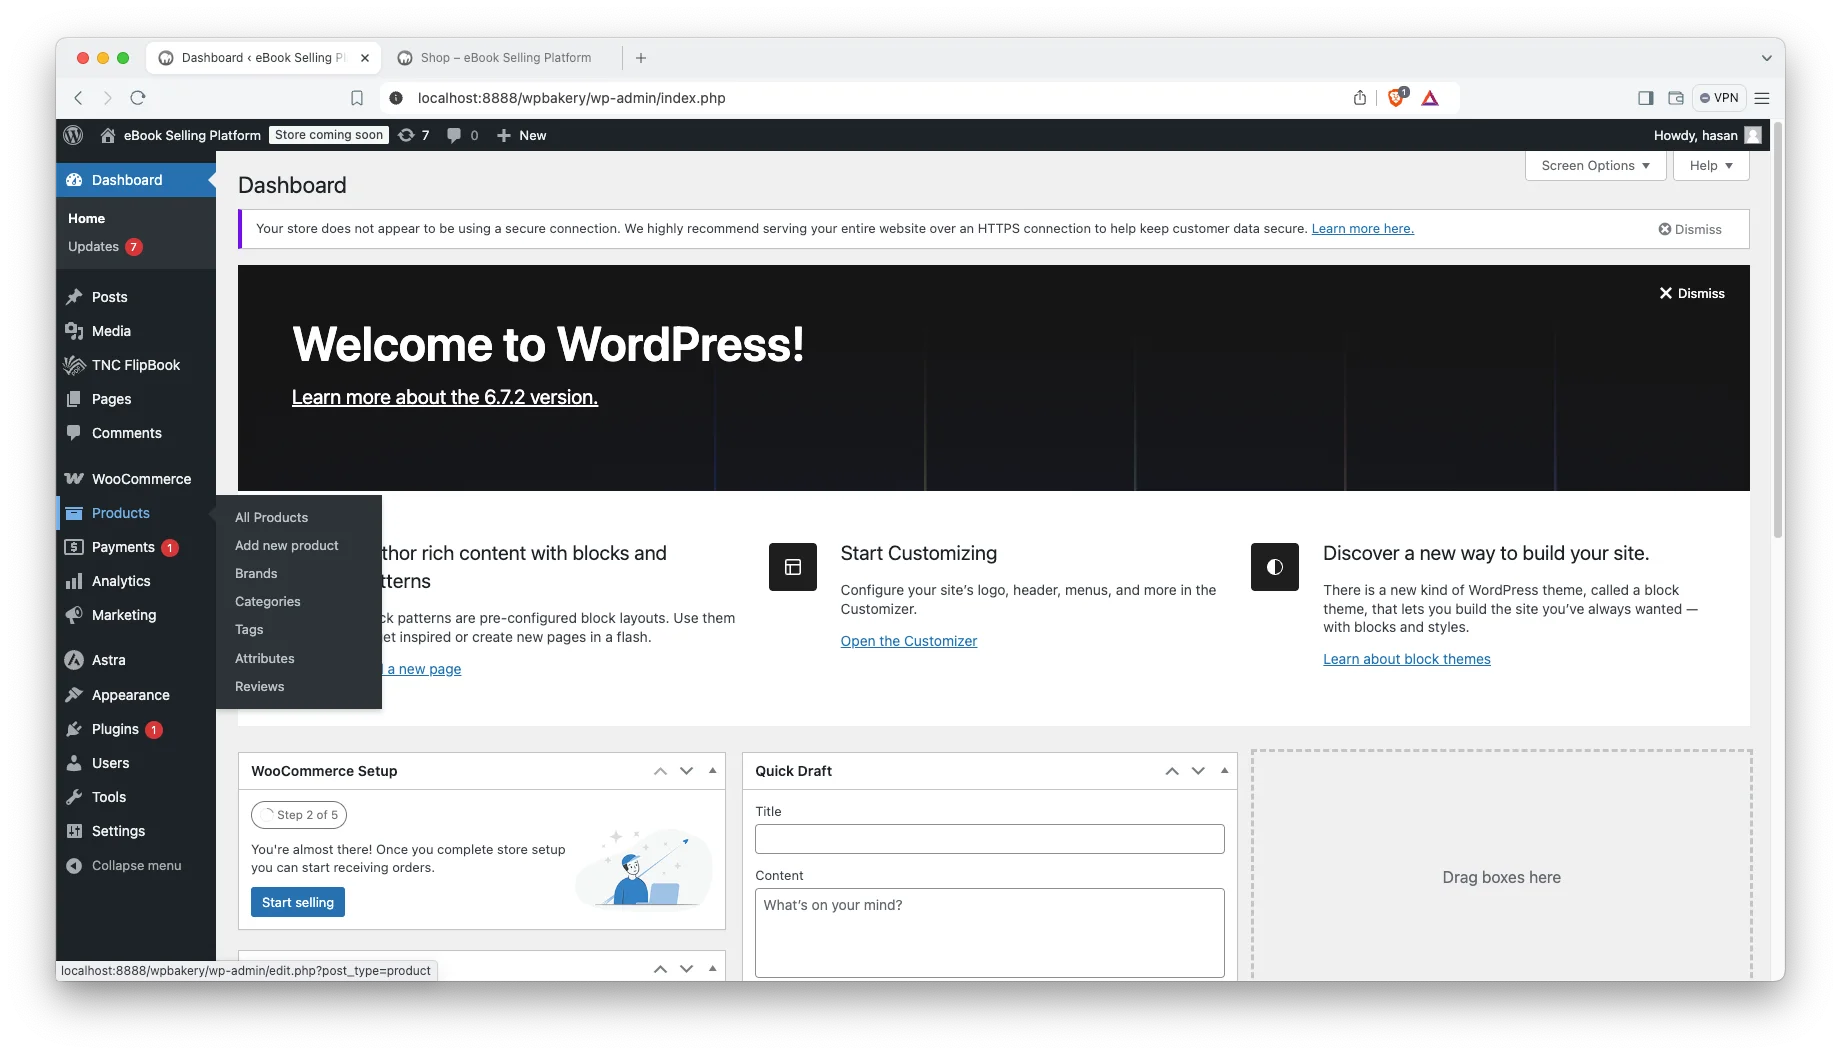
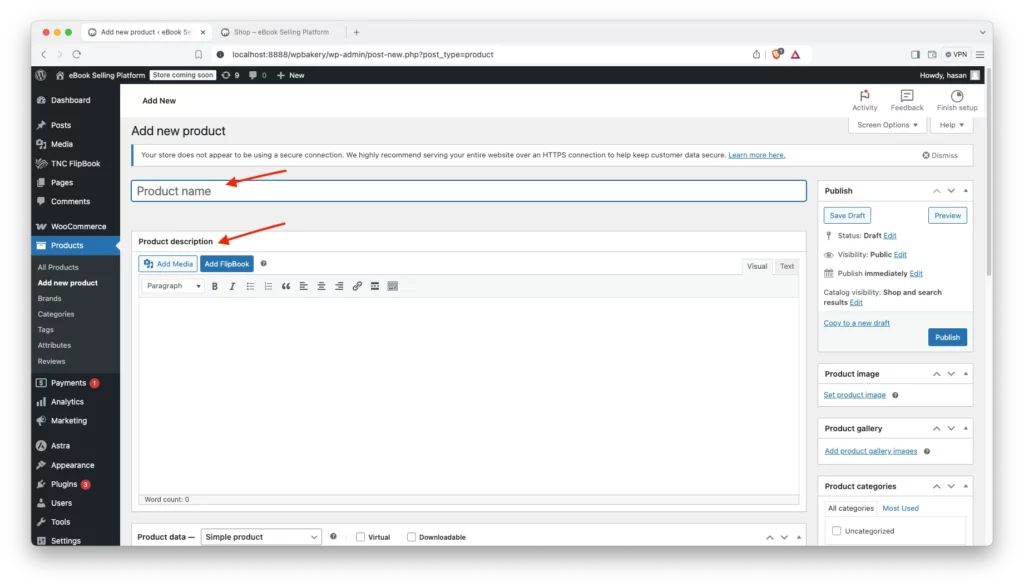
- Create Product: Go to Products and click “Add New Product” in your WordPress dashboard.
- Title & Description: Give your eBook a title and write a good description.
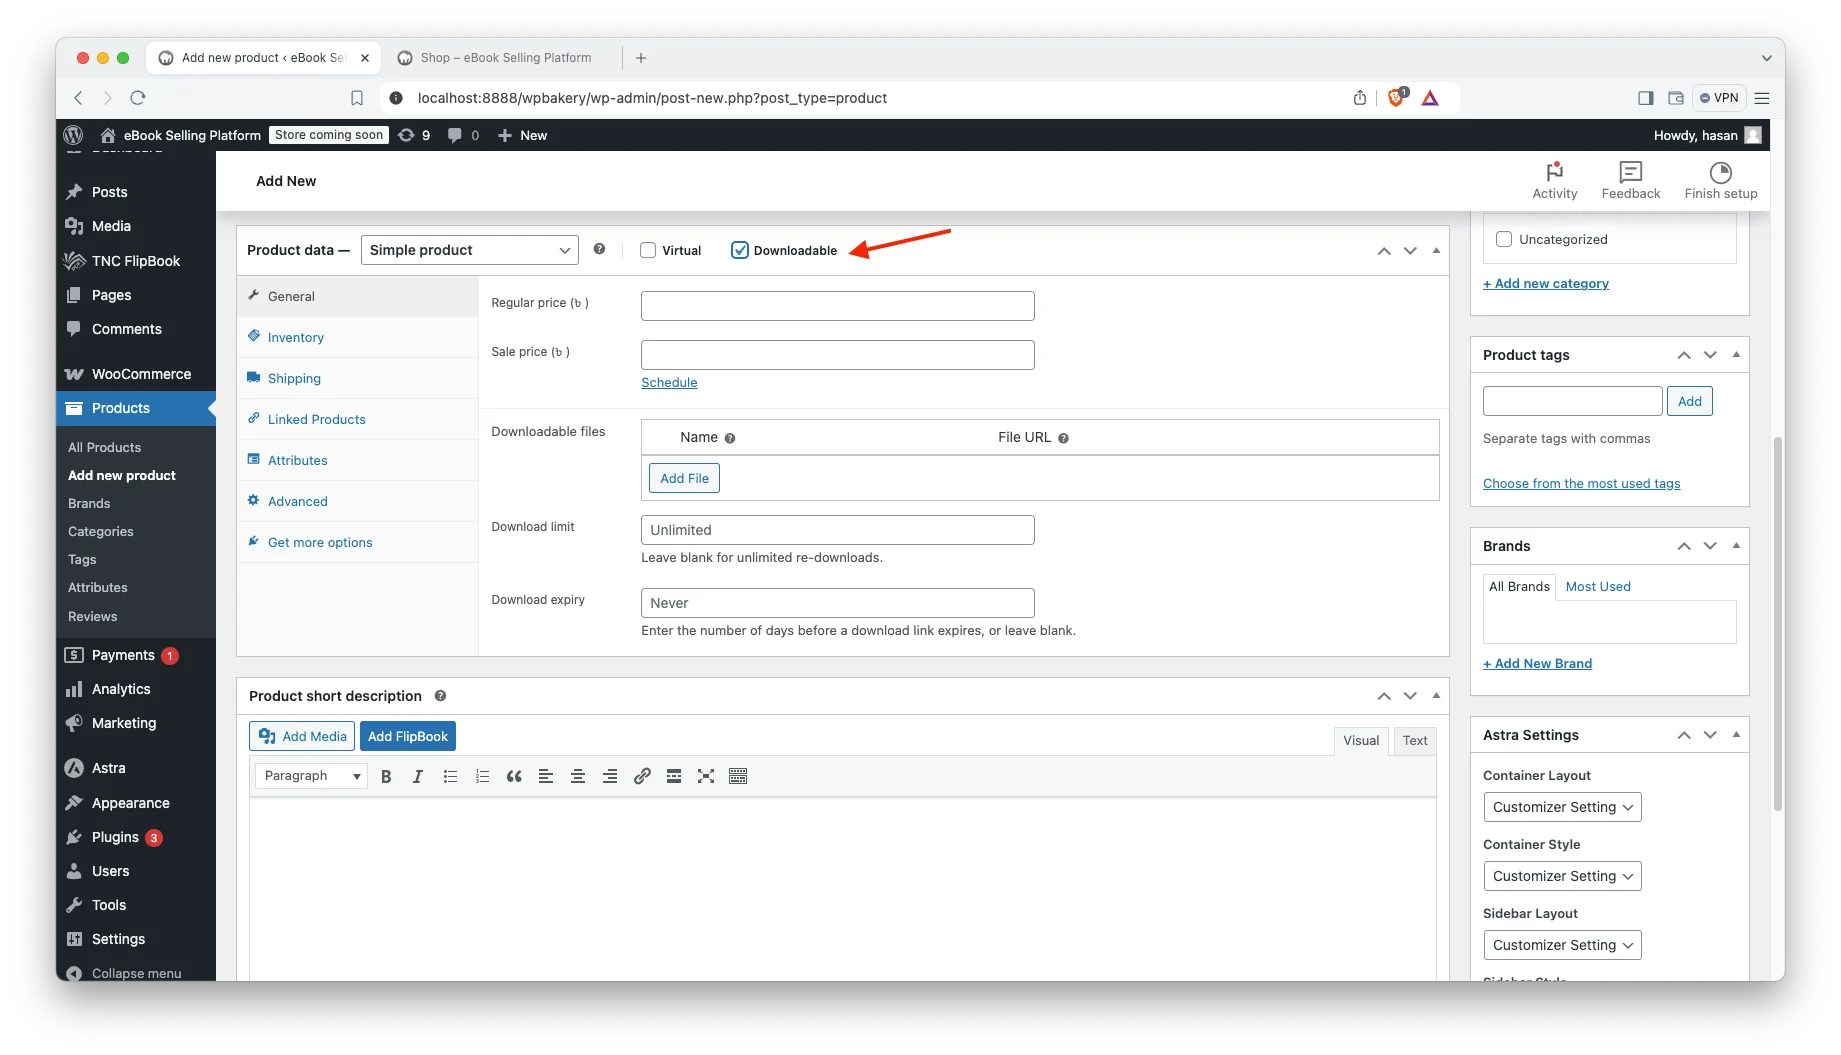
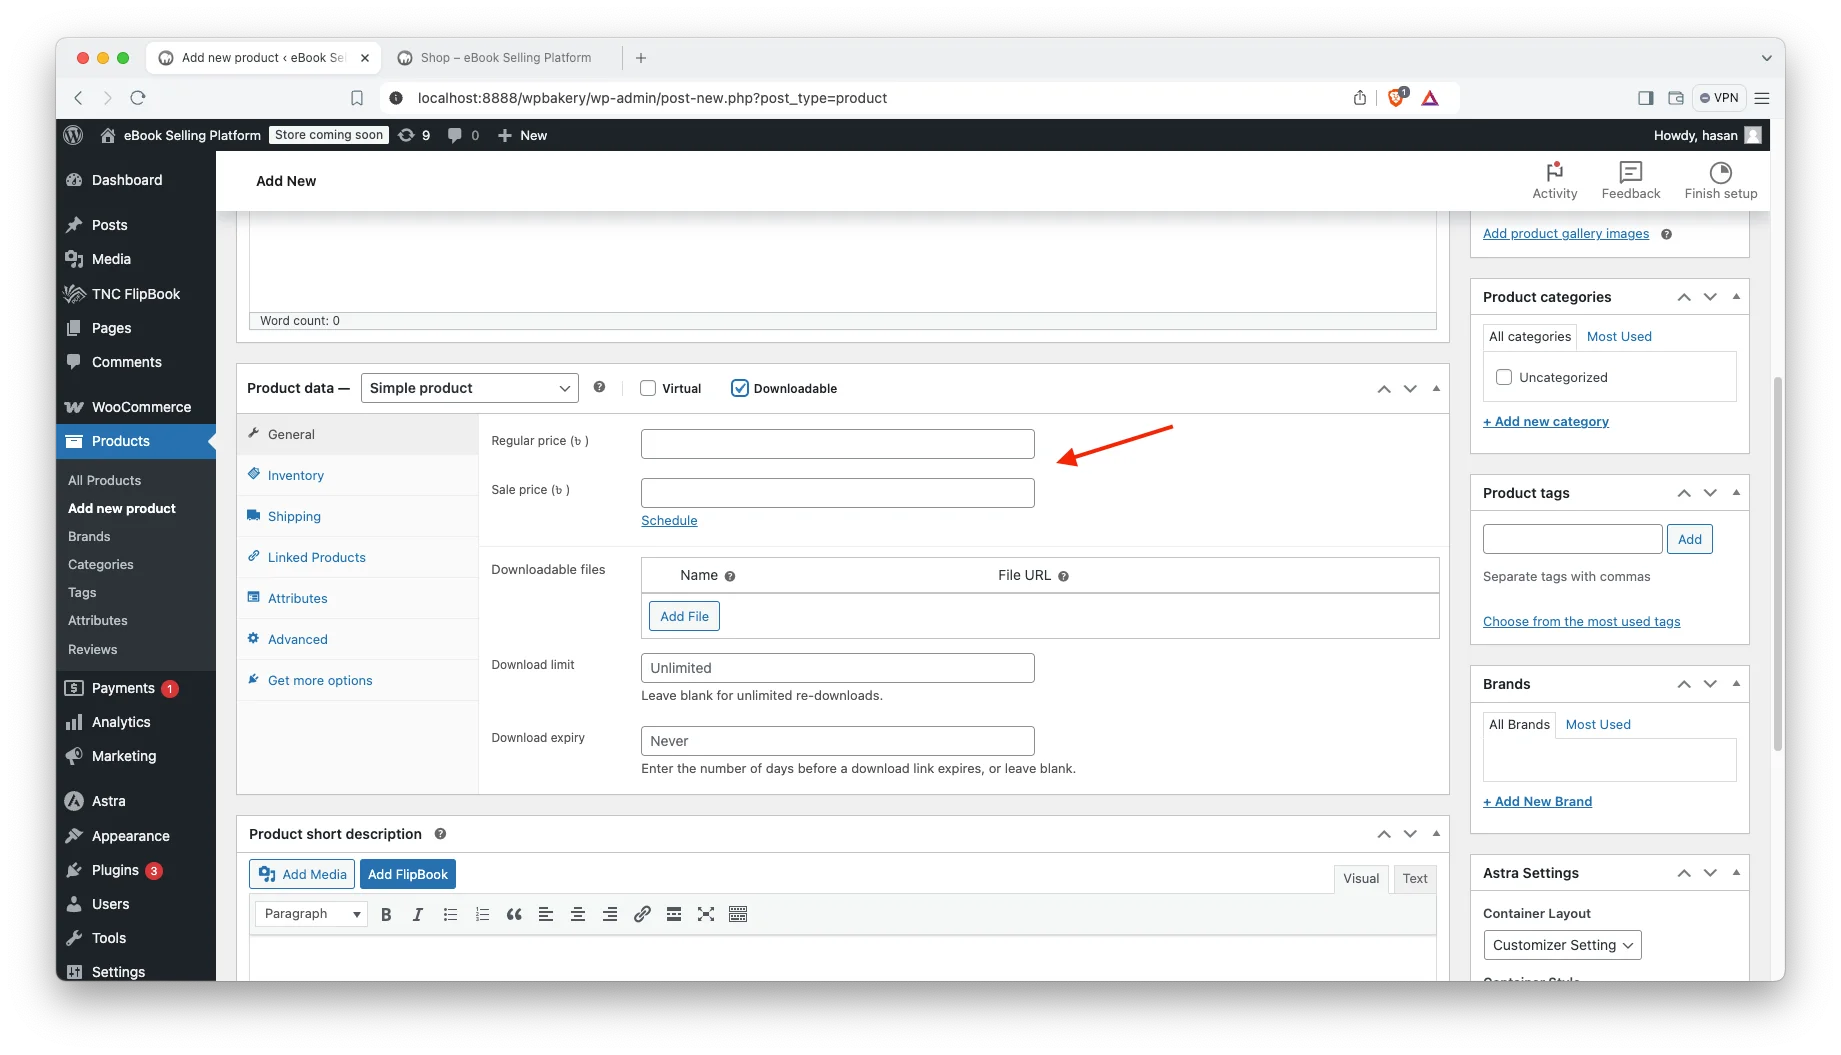
- Upload Files: In “Product data,” check “Downloadable.” This tells WooCommerce it’s a digital product. A new section, “Downloadable files,” will appear.
- Add File: Click “Add file” and you will find the “File URL” section.

- FlipBook URL: you need to copy and paste the FlipBook URL that you created before. You can easily copy the URL of your flipbook. Just go to TNC FlipBook and go to All Flipbooks.
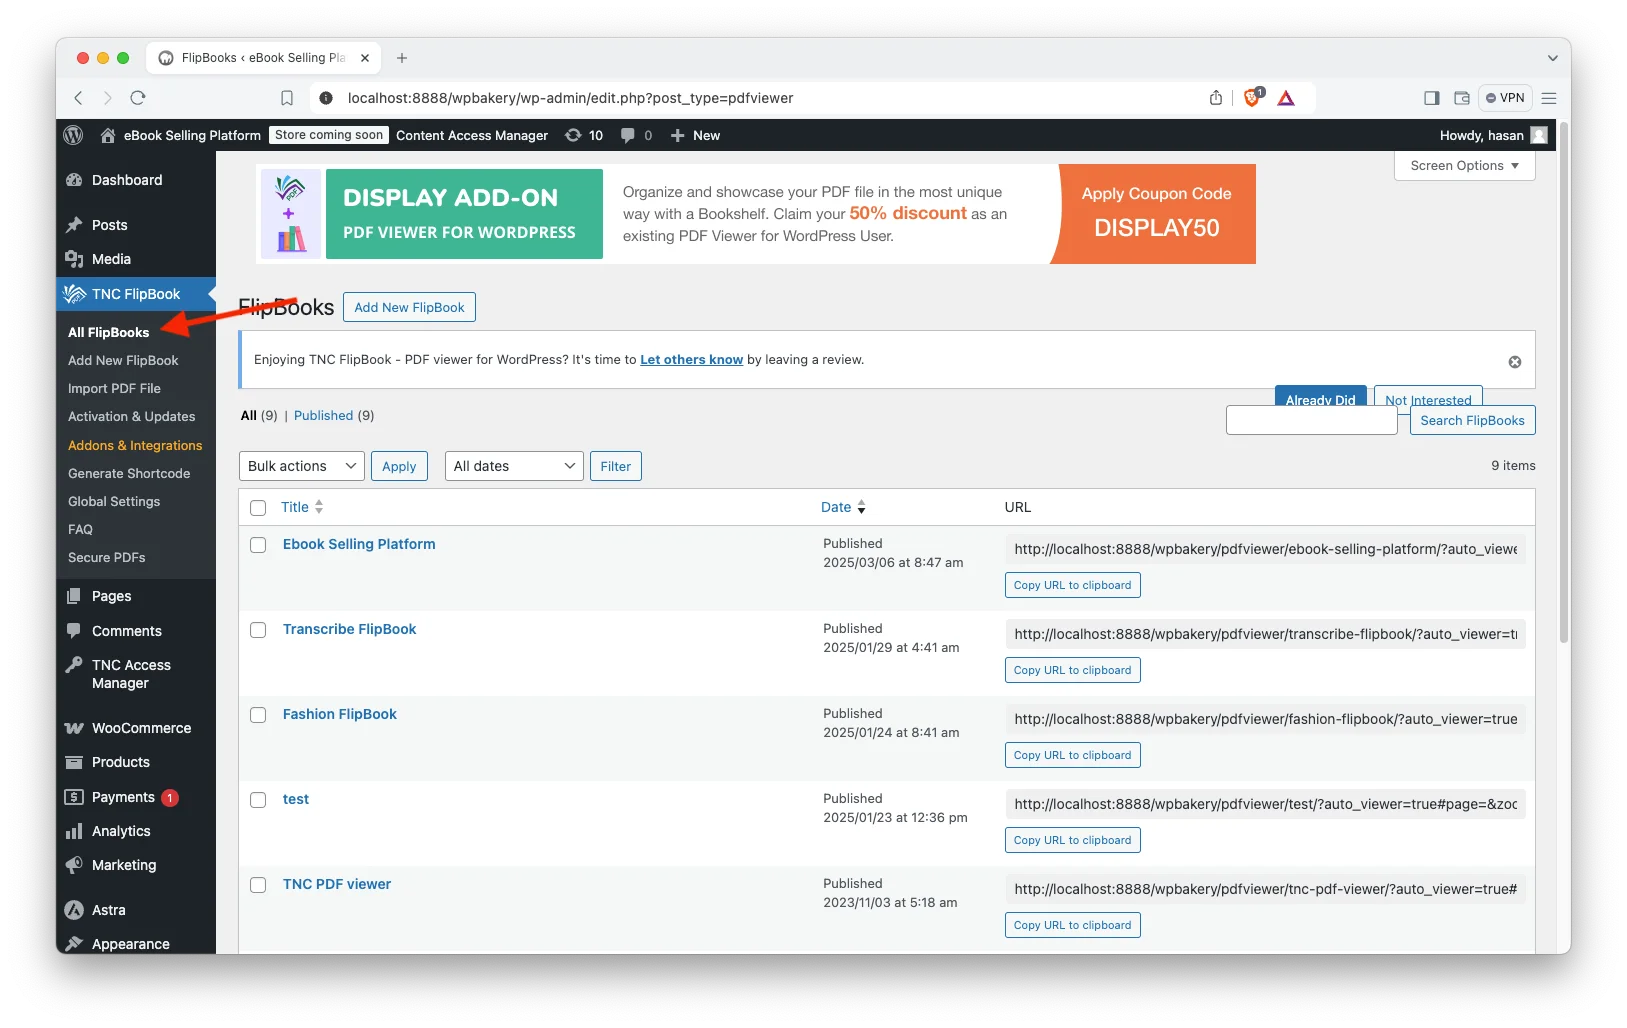
- Copy Your FlipBook URL: Here, you will see a section for URLs. Just click on “Copy URL to clipboard” for your specific flipbook and you are done.

- Paste Your FlipBook URL: After copying your flipbook URL, now go back to the downloadable area of the product section and paste the URL.

- Add name: After copying and pasting the URL of your flipbook, add a file name in this field.

- Set Price: Enter the price in “Product data.”
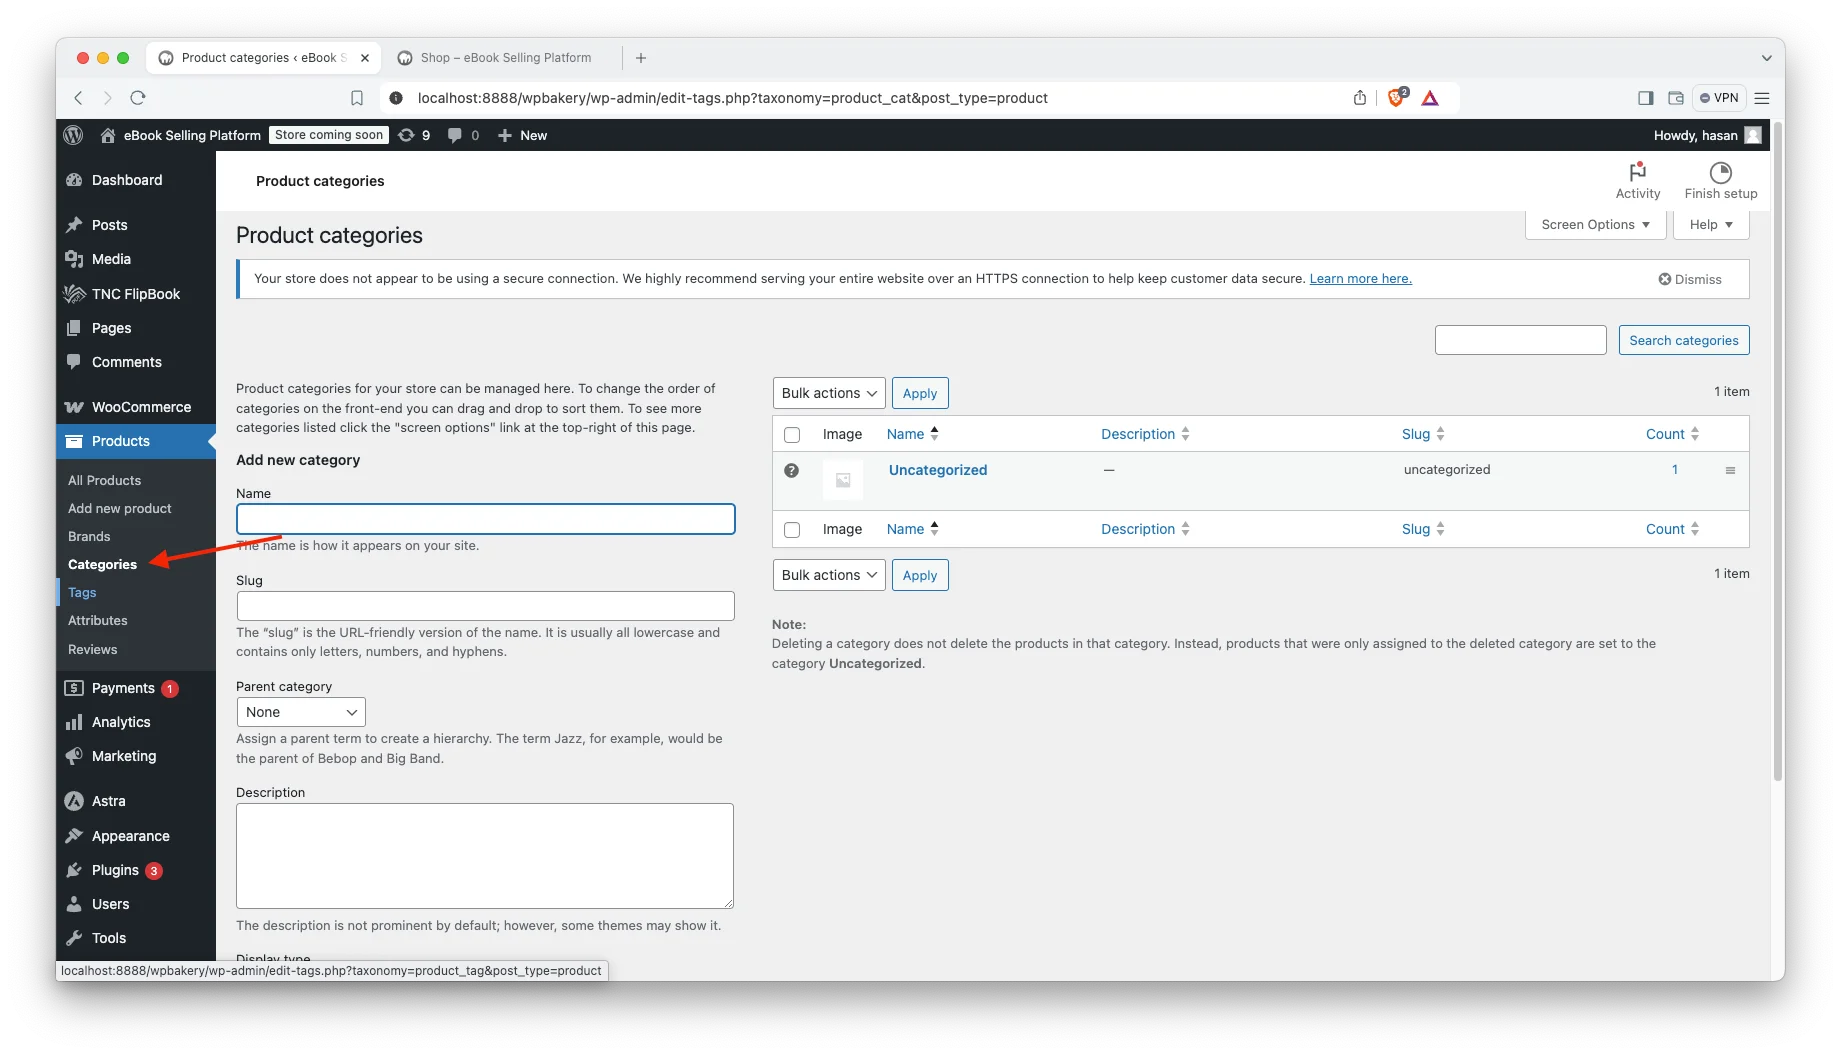
- Category/Tags (Optional): Organize with categories and tags.
- Product Image: Add your eBook cover image.
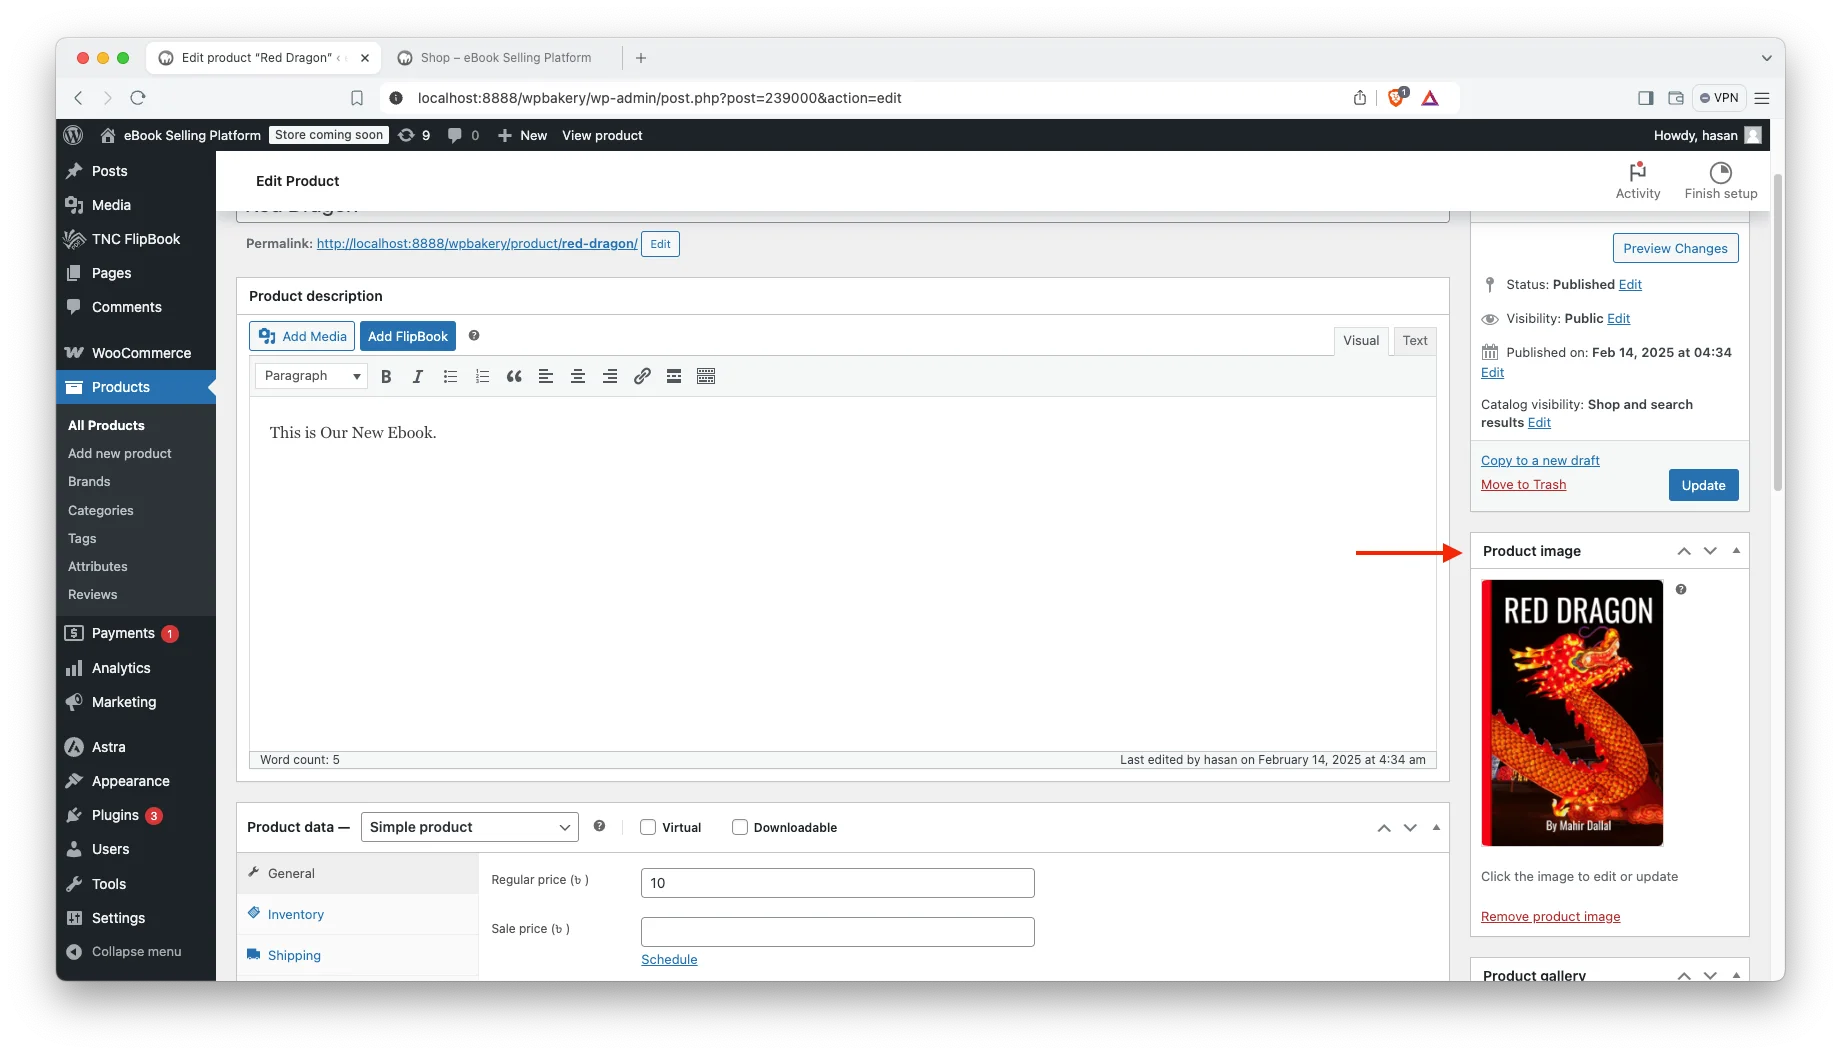
- Publish: Click “Publish” and you are done.
Step 6. Add Security/Restrictions to Your eBook using WP File Access Manager:
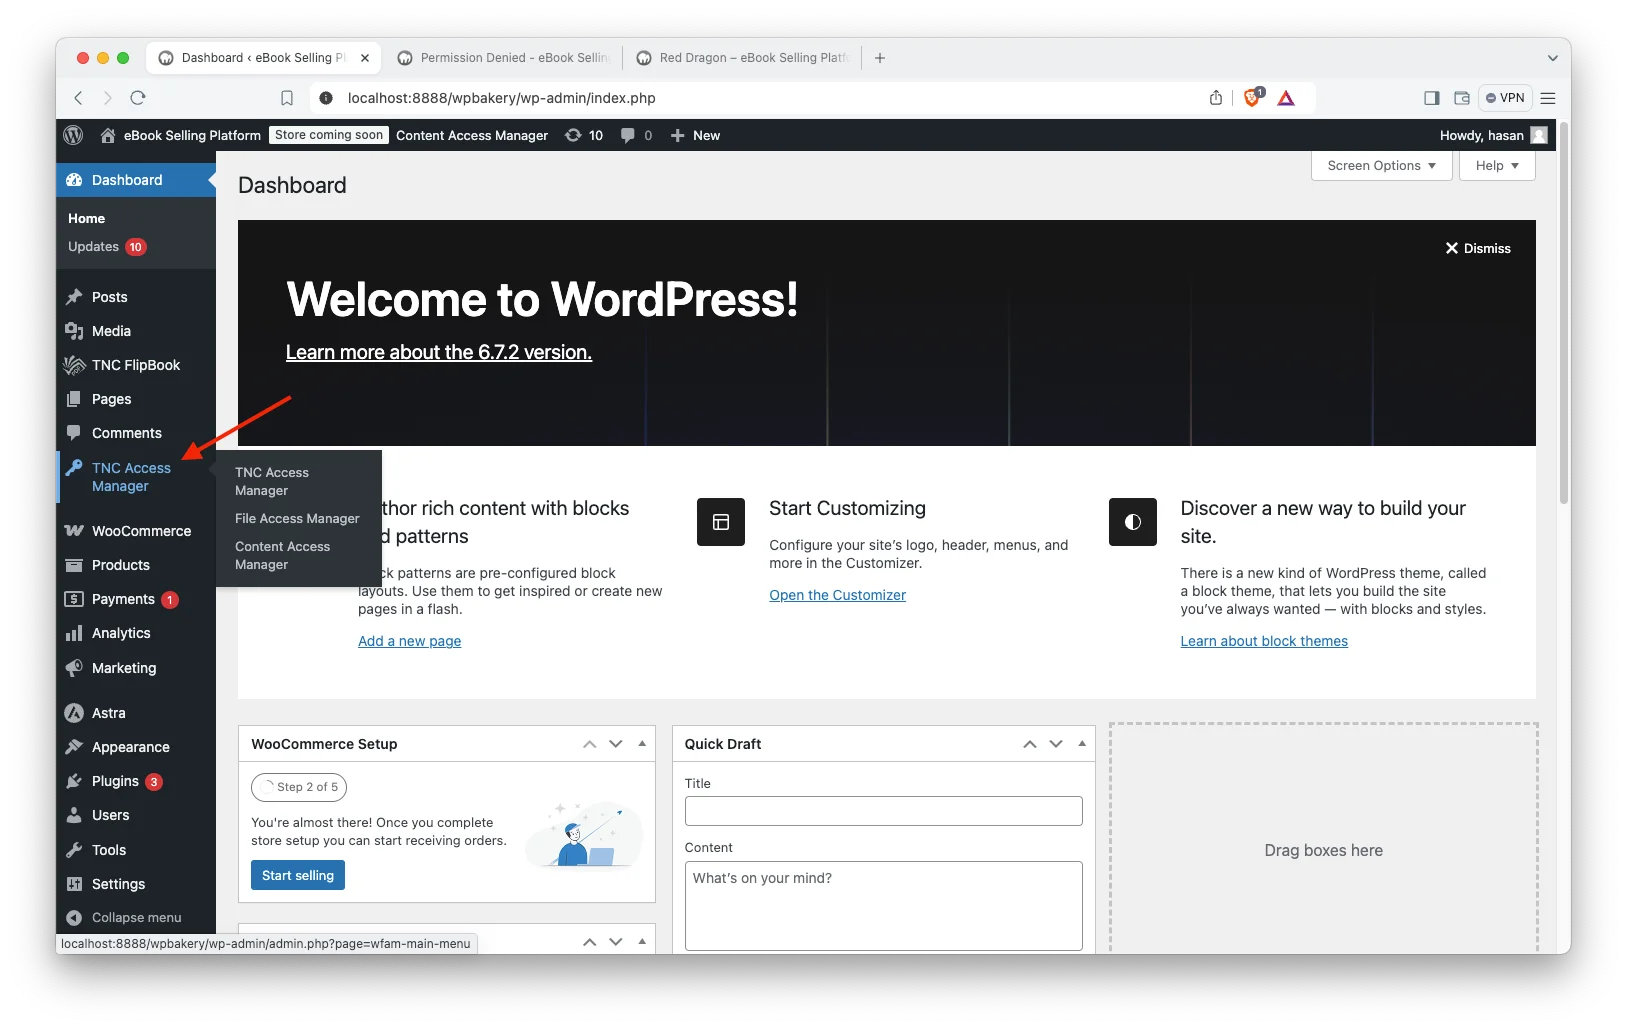
- Access WP File Access Manager: You will find “TNC Access Manager” in your WordPress dashboard. Click on it and here you will find “File Access Manager”. Click on it and you will get all the options.
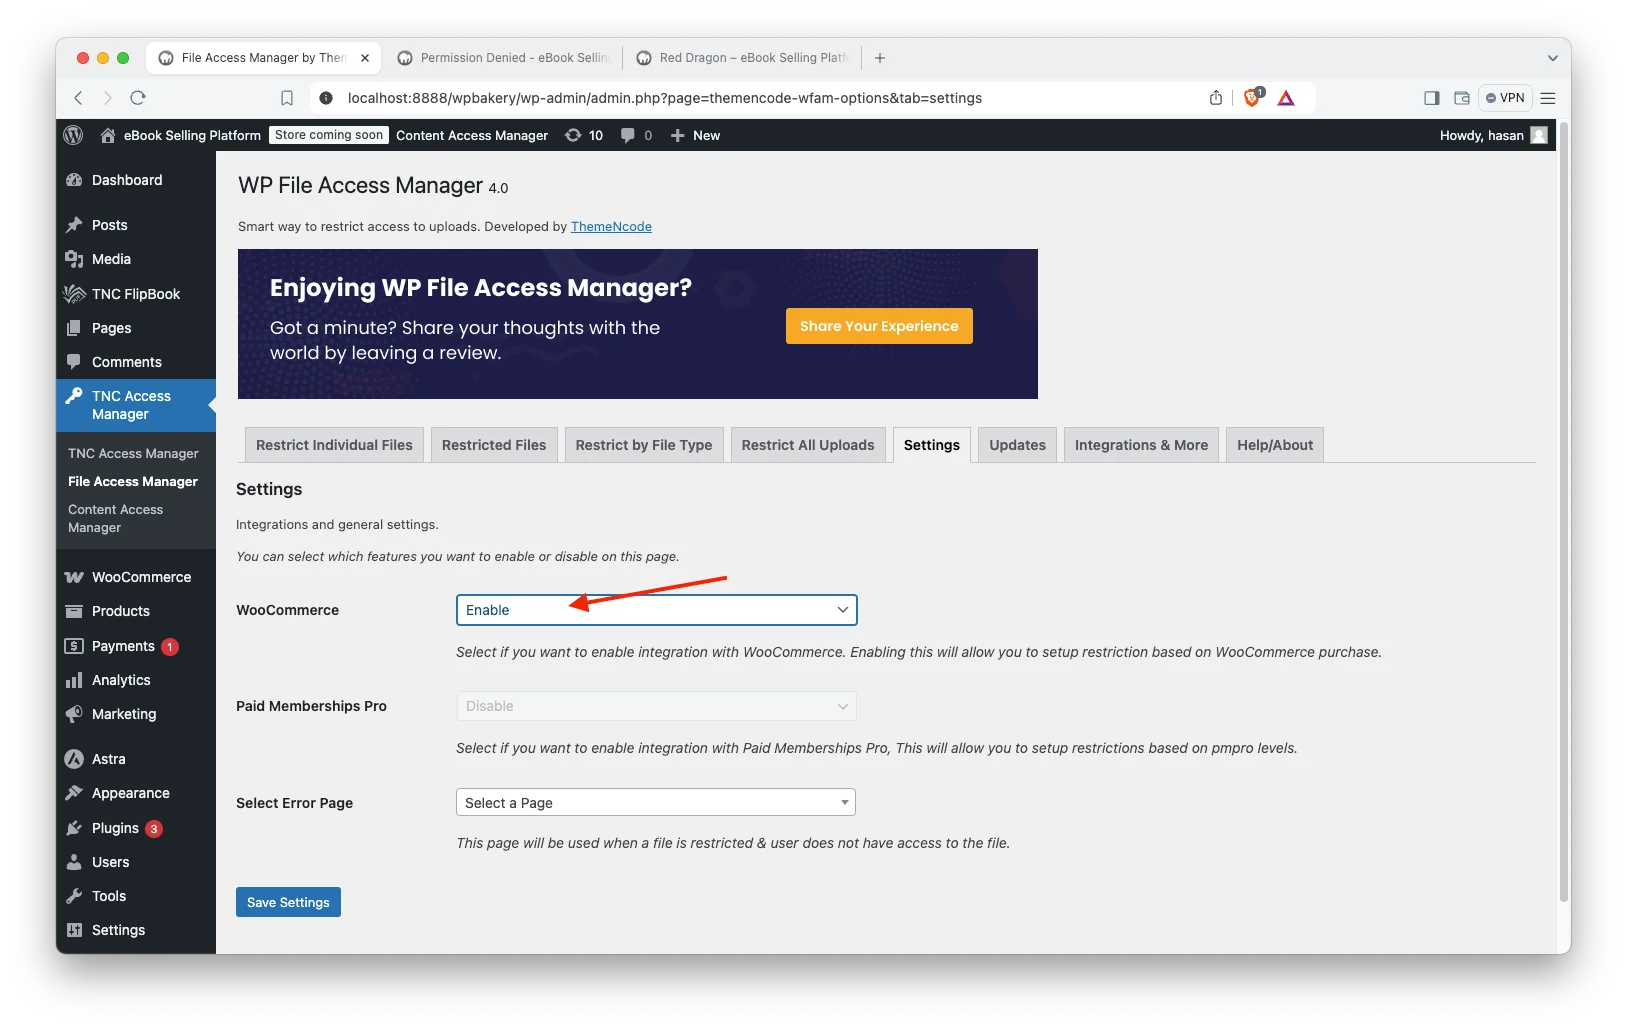
- Go to Settings Tab: Here, you will find “WooCommerce”. WooCommerce integration is disabled by default. Click enable to work with WooCommerce products. Enabling this will allow you to set up restrictions based on WooCommerce purchase.
- Restrict Your eBook/PDF Files: Now go to the “Restrict Individual Files” tab. Here, you will find an option to select or upload your PDF file. Simply click on “Upload or Select a File” and select the PDF file you created for your eBook from the media library.
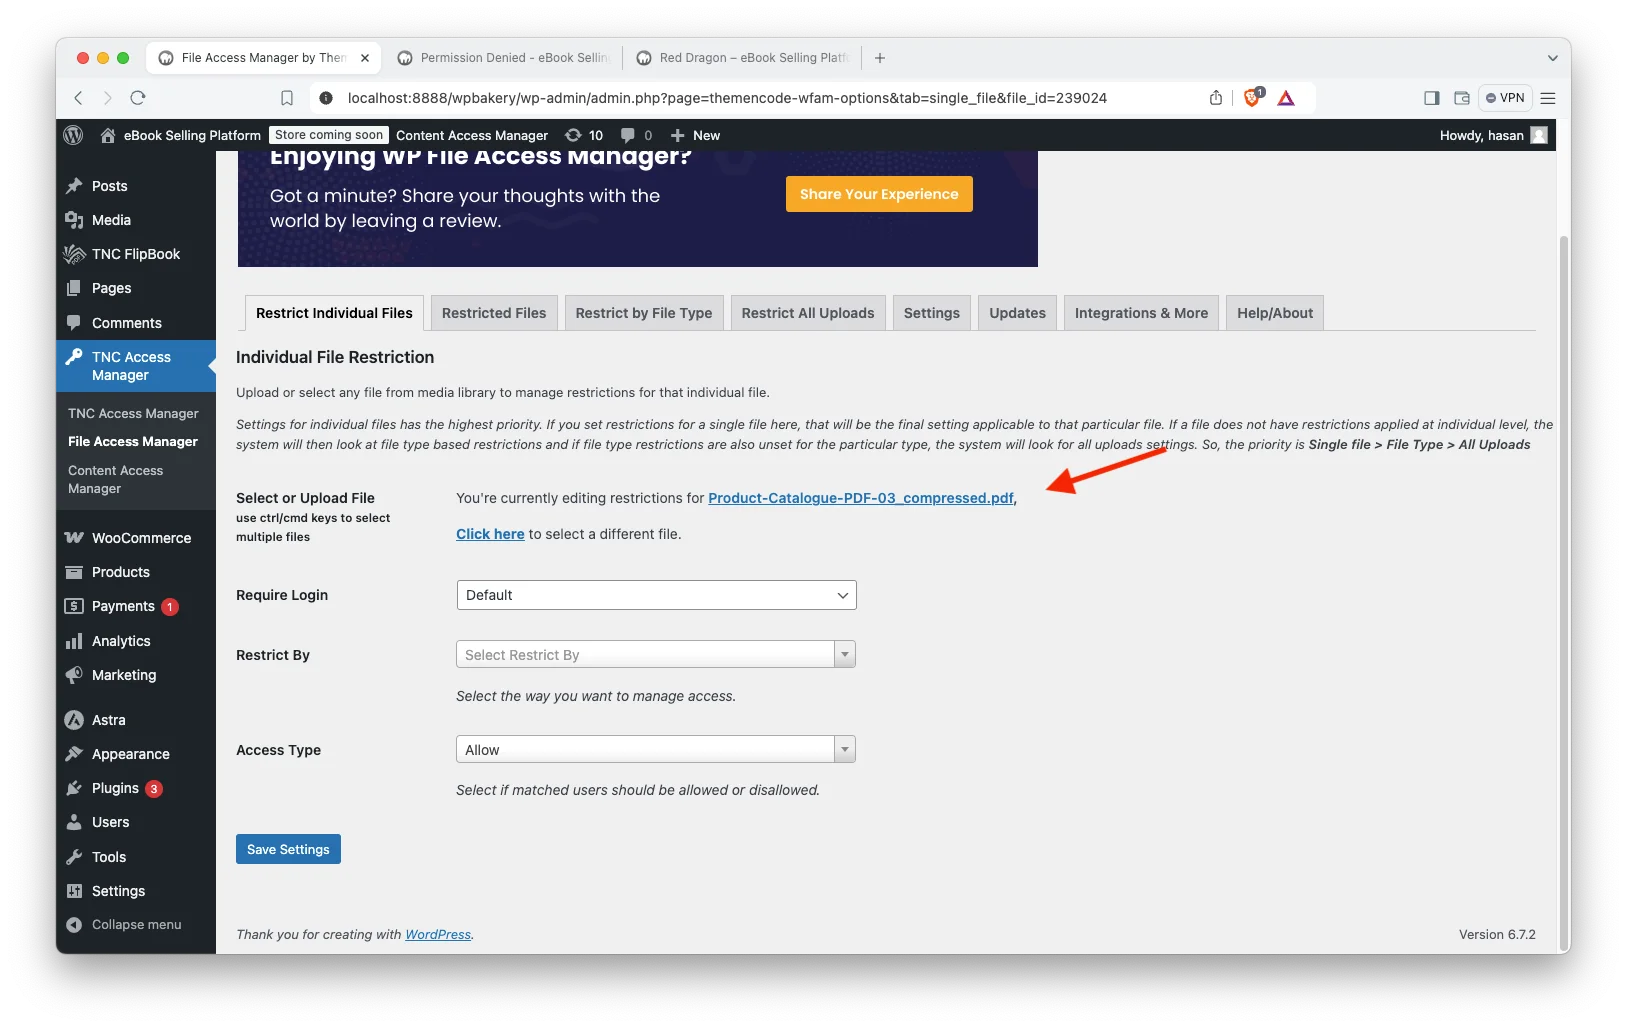
- Require Login: After selecting your eBook/PDF file, you will find the “Require Login” option. This option is not enabled by default. Click on “Require Login” and select “Yes (The file is restricted)”.
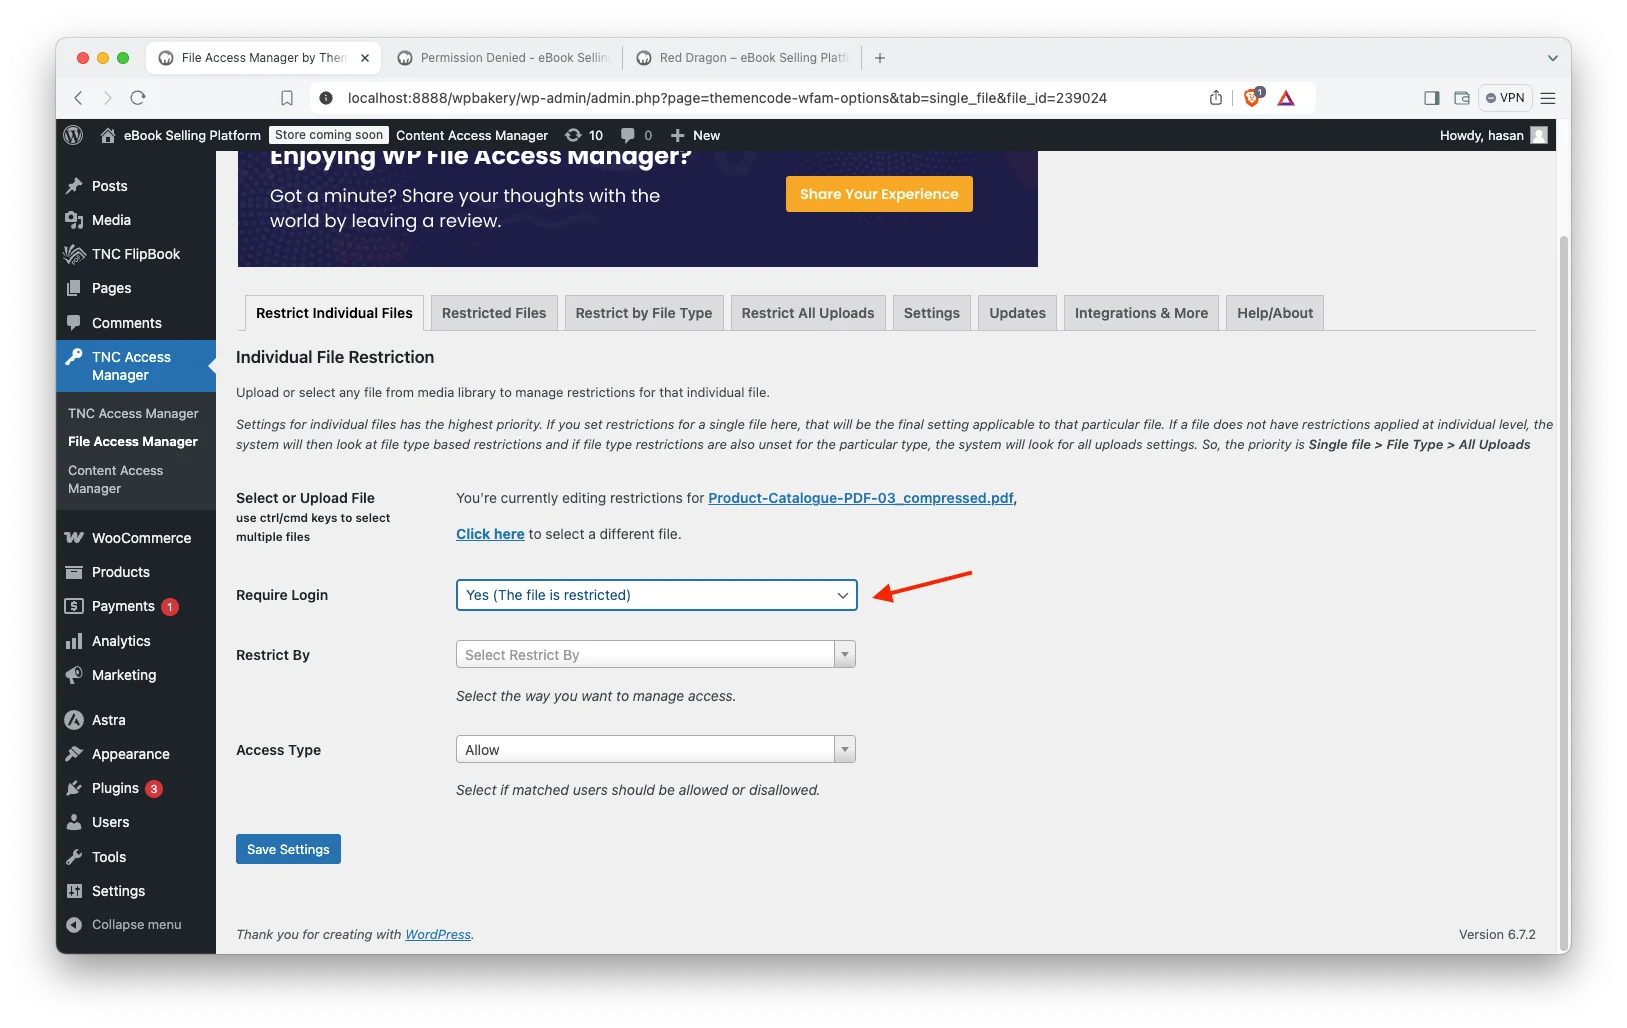
- Restrict By: You will find “Restrict By.” Click on Restrict By and select “WooCommerce”. You need to restrict specific user roles.

- Access Type: After that, click on Access Type and select “Allow”.

- Select WooCommerce Products: In this field, you need to select the WooCommerce products that you created in step 5. Search by typing the name of that WooCommerce product and you will find and restrict it.

- Save Settings: After completing all these tasks, click “Save Settings” and you are done.
Congratulations! Your setup is now ready for testing with your First FlipBook. Once it’s tested, you can start creating additional FlipBooks following the exact same steps as above.
Step 7. Configure Payment System & Test Your Platform:
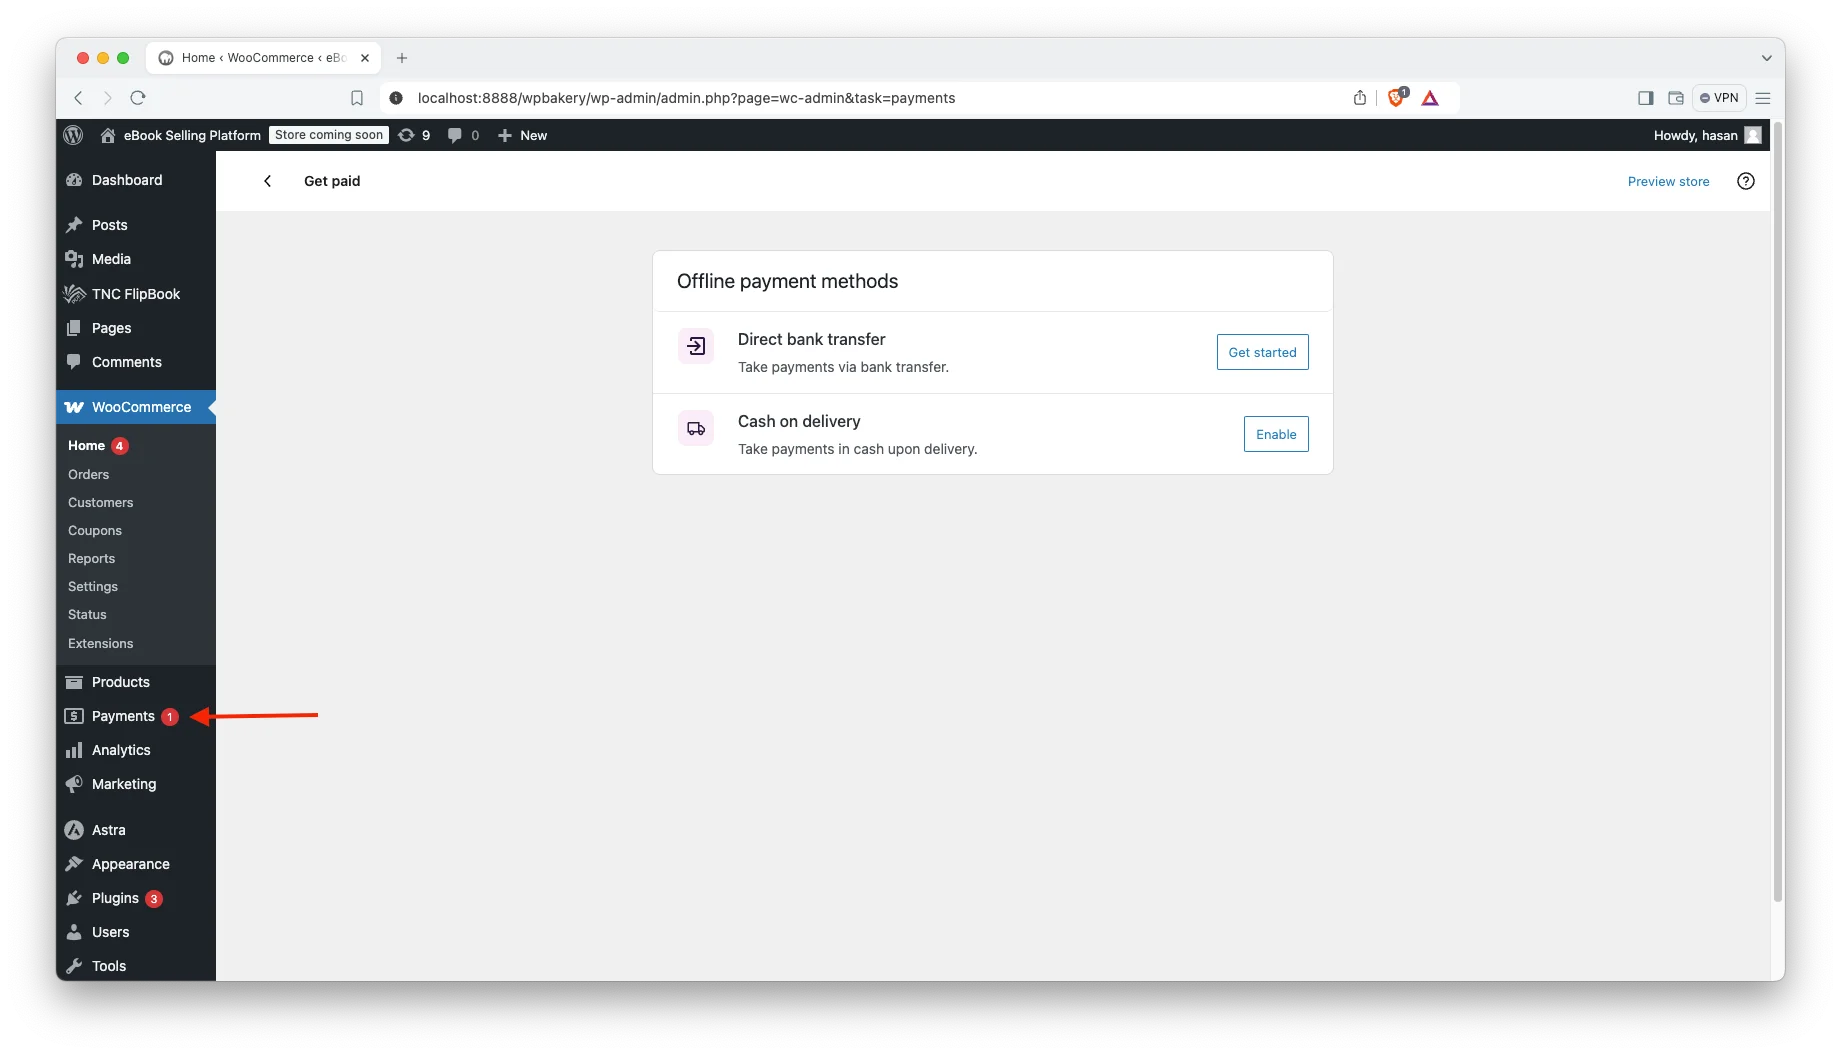
- Set Up Payment Gateway: Configure your chosen payment gateway in WooCommerce settings.
- Place a Test Order: Go through the entire purchase process to ensure everything works smoothly. Once the order is placed successfully, you should see the link to flipbook on the confirmation page as well as in the confirmation email. Click on that link to view the flipbook. You must be logged in to the same account you purchased wth to view the FlipBook, otherwise you won’t be able to get the FlipBook as its restricted by WooCommerce Purchase.
- Check FlipBook Functionality: Make sure the flipbook works correctly on different devices.
- Preview Your eBook: After doing all these settings and changes, simply preview your eBook to see the results.
That’s it, this is how you can create your flipbook-powered eBook selling platform quickly with WordPress. If you encounter any issues while setting up your platform, please let us know using the comments section or use our support portal to create a support ticket if you are our existing customer.
Watch on YouTube
Want a Simpler Way? Meet TNC FlipBook 3D
The step-by-step guide above works great and gives you full control over your eBook selling platform. But if you look at the plugin list in “What You Need,” you will notice it requires four separate tools to get everything working. For some users, especially beginners, setting up and connecting all four of these can feel like a lot.
The good news is that there is now a simpler way to do this. We recently launched TNC FlipBook 3D, which is a completely new version of the plugin and has built-in security, access control, and more integrations. You do not need WP File Access Manager and the Secure PDFs addon. Everything you need to sell and protect your eBooks is already inside the plugin.
TNC FlipBook 3D is not just an upgrade in design. It is a complete rebuild with a brand-new 3D rendering engine powered by WebGL via Three.js, which means your eBooks look and feel like a real physical book when readers flip through them. If you are just getting started and want the simplest possible setup, TNC FlipBook 3D is the right choice for you. It removes the complexity of connecting multiple plugins and gives you a more powerful, more beautiful result with less effort.
How to Maintain & Grow Your Platform?
- Keep Everything Updated: Regularly update WordPress, your theme and all plugins to ensure security and compatibility.
- Monitor Performance: Track your website traffic, sales and other metrics to identify areas for improvement.
- Gather Feedback: Actively collect feedback from your readers and make adjustments to your platform based on their suggestions.
- Offer Customer Support: Be responsive to customer inquiries and provide helpful support.
- Expand Your Reach: Continuously add new eBooks to your store to keep your readers engaged.
How to Promote Your eBook Selling Platform?
- Tell Your Audience: Announce your new eBook store to your email list, social media followers and website visitors.
- Social Media Marketing: You can share your flipbook perfectly on social platforms. You can beautifully showcase your content and create promotions on social media platforms.
- Email Marketing: Build an email list and send regular newsletters to promote your eBooks and engage with your readers.
- Content Marketing: Create blog posts, articles, or videos related to your eBook topics to attract potential readers.
- Paid Advertising: Consider using paid advertising platforms like Google Ads or social media ads to reach a wider audience.
- Affiliate Marketing: Partner with other authors or influencers to promote your eBooks.
Conclusion
You just learned how to create your own flipbook powered eBook selling platform using WordPress. With step-by-step instructions, I have shown you how to perfectly build your e-book selling platform. I showed you how to set up WordPress and all the plugins and addons you need for your platform. I explained how to create attractive flipbooks. You also learned how to accept payments securely. You can control prices and promotions to build customer relationships. This results in higher revenue and stronger connections.
This guide will help you gain the knowledge and tools to market your eBook. This process may seem daunting at first, but it is a manageable step. This is possible when you create your own eBook selling platform. Give your customers a great experience. Make it easy for them to buy your eBook. Let people know about your platform.
If you need any help, feel free to contact us or comment below. Apart from this, if you want to read more blogs, visit here.
0 Comments